 OrchardHQ
Plan your new orchard, field by field.
Draw a boundary on the satellite map, or walk it with the mobile app. Pick varieties and rootstocks, set spacing and headlands, include interplanting, let the grid generator place every tree, check that the planting pollinates itself — finalise and plant. For adding trees that are already in the ground, see the Map guide.
Need precision mapping? Drone mapping before you plan works well — a centimetre-accurate base to draw and place on. See the Precision mapping guide.
1. Details
From the Plans tab on the web, hit + New plan and trace a boundary polygon on the satellite imagery — the same Mapbox imagery the field map uses, so what you see is what you'll plant on. Set the field name and the primary fruit type and rootstock — picking a crop pre-fills blank variety rows and seeds a standard row spacing for it.
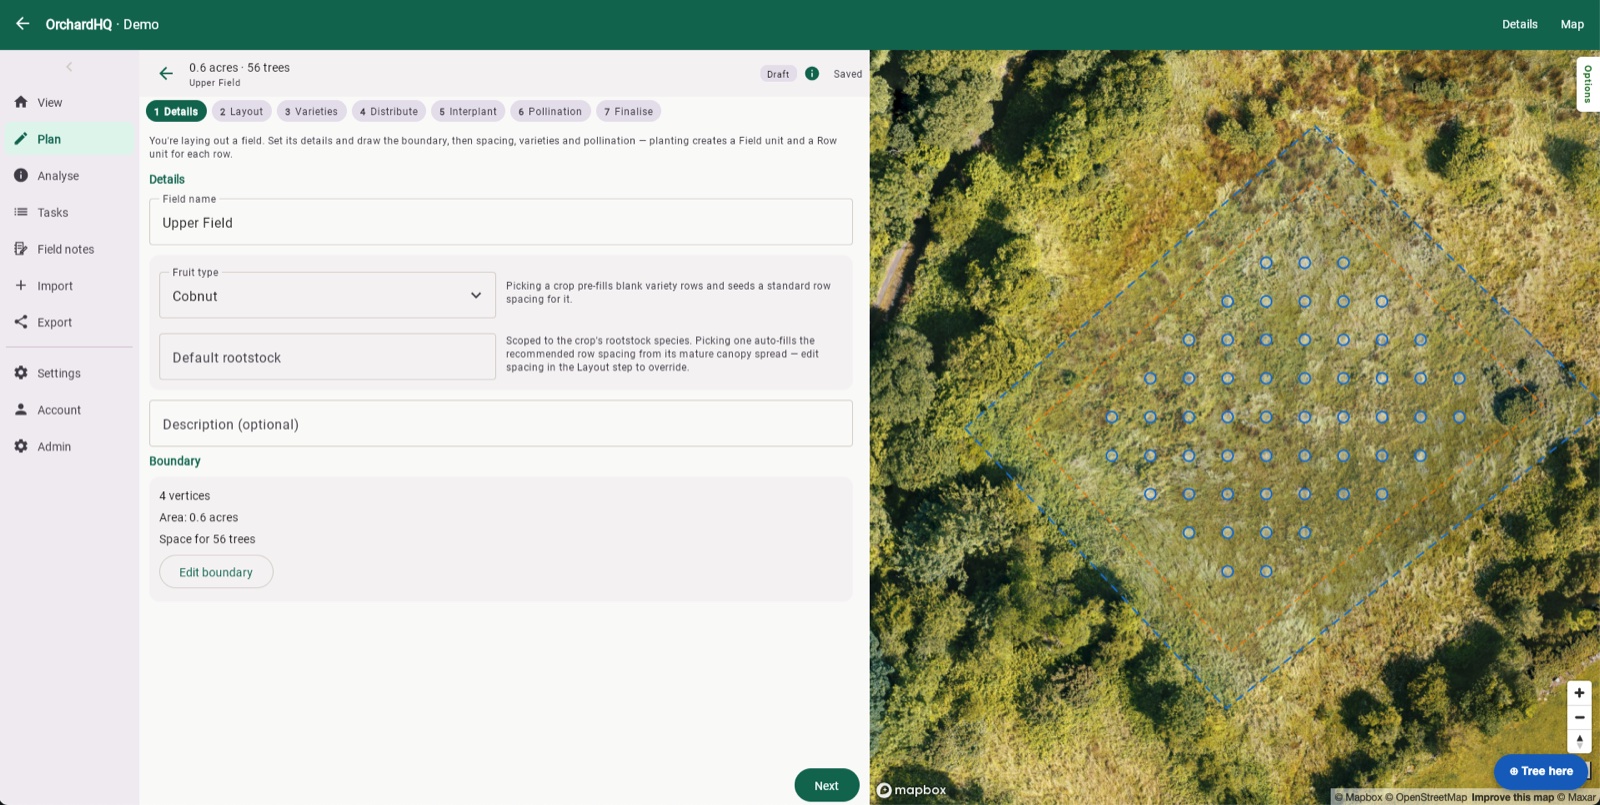
Or walk the boundary in the field
On the mobile app, walk the perimeter and mark a vertex at each corner — watch the polygon update on the map as you go. You can record site features here too — rocks, wet spots, existing trees — so they're on the plan before you lay out a single row.

2. Layout
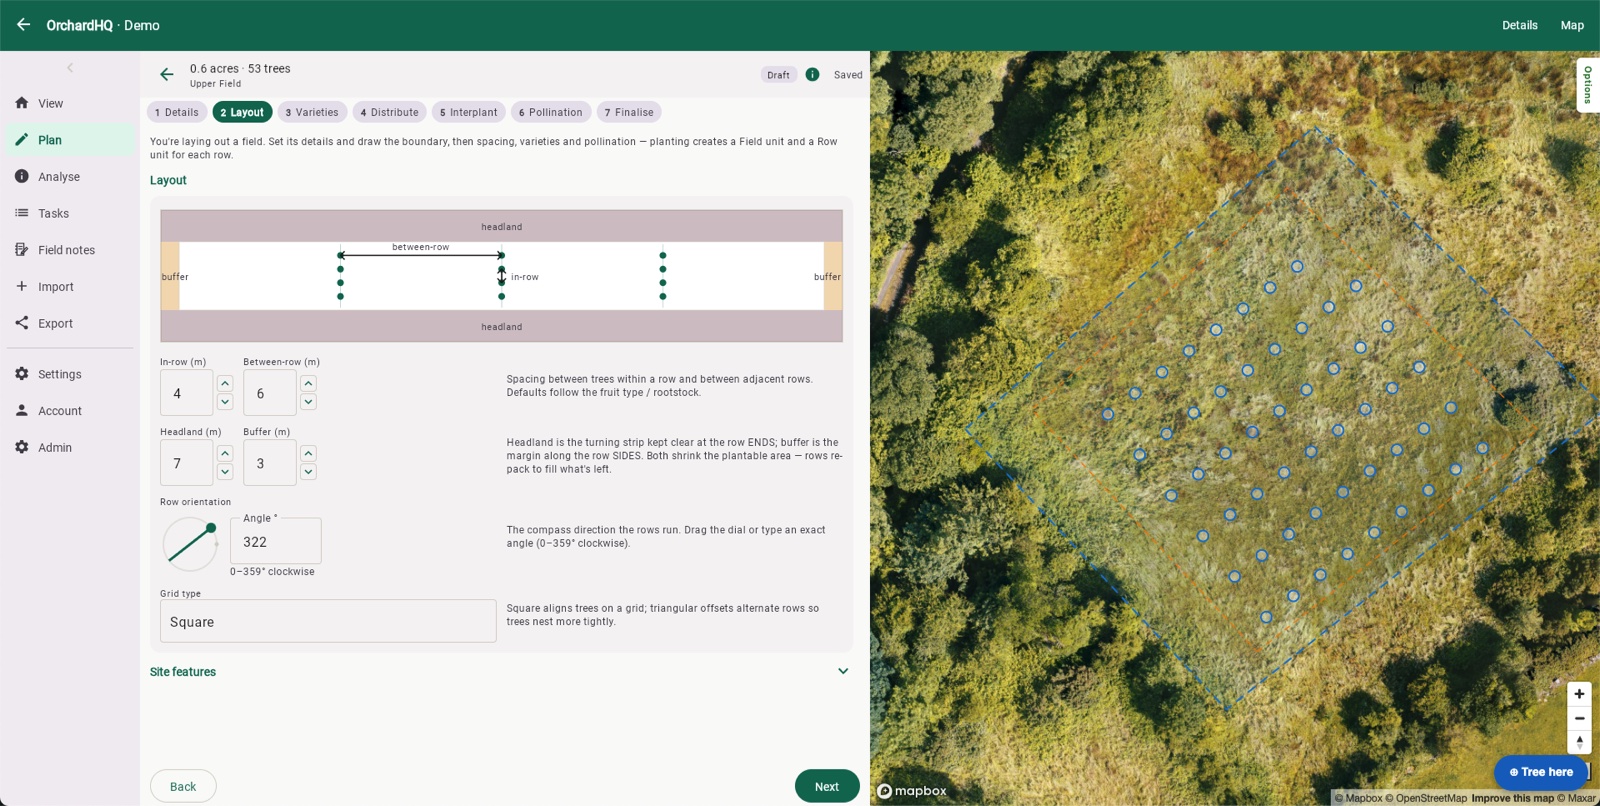
Set in-row and between-row spacing — defaults follow the fruit type and rootstock, but you can override them — plus a headland (the turning strip kept clear at row ends) and a buffer (the margin along the row sides). Both shrink the plantable area; rows re-pack to fill what's left. Drag the compass dial or type an exact angle to set row orientation, and choose a grid type — square aligns trees on a grid, triangular offsets alternate rows so trees nest more tightly.
3. Varieties
Add each variety with its fruit type, name and optional rootstock, and mark it as a pollinator or nitrogen-fixer if it is one. Set a target quantity or percentage per variety — the mix needs to total 100% before you can distribute.

4. Distribute
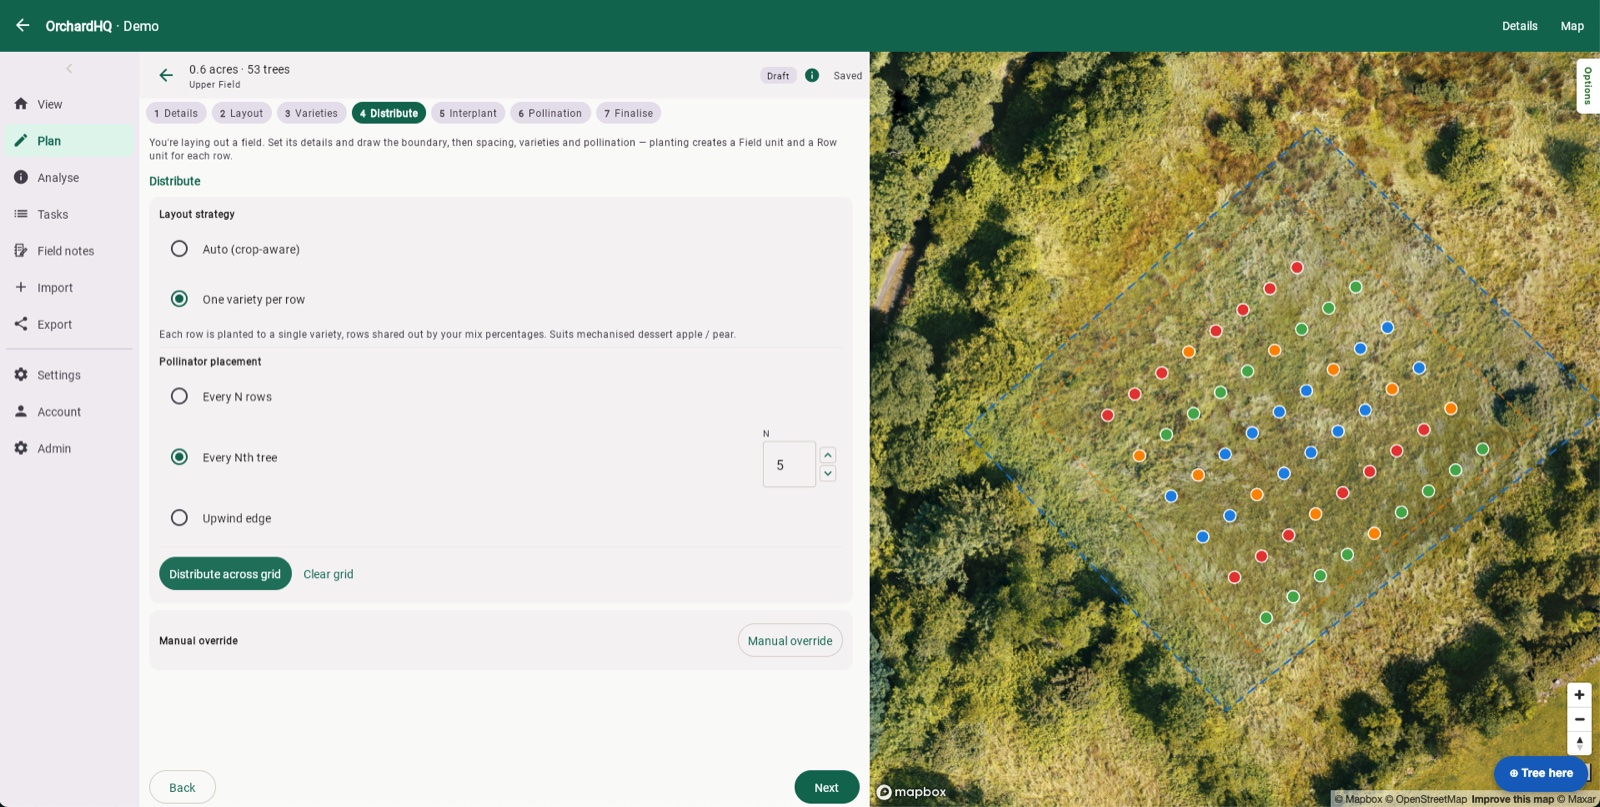
Choose a layout strategy — Auto (crop-aware) or one variety per row (each row planted to a single variety, rows shared out by your mix percentages — suits mechanised dessert apple or pear) — and how pollinators get placed: every N rows, every Nth tree, or along the upwind edge. Hit Distribute across grid and the trees are placed on the spacing you set. A manual override is there if you want to move individual trees afterwards.
5. Interplant
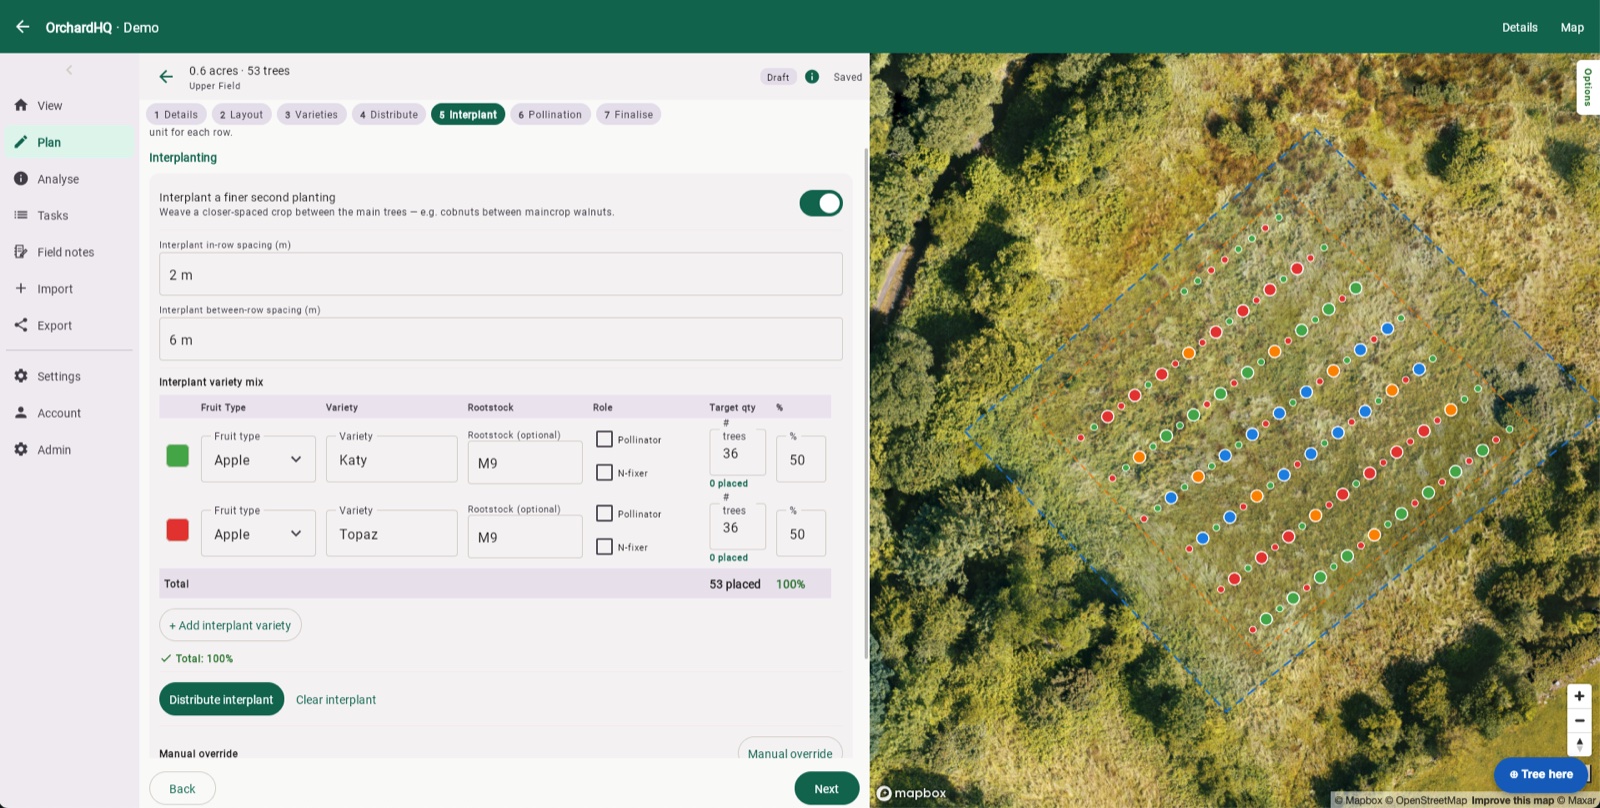
Weave a closer-spaced second planting between the main trees — e.g. cobnuts between maincrop walnuts. Set the interplant's own in-row and between-row spacing and its own variety mix, independent of the main planting, then distribute it the same way.
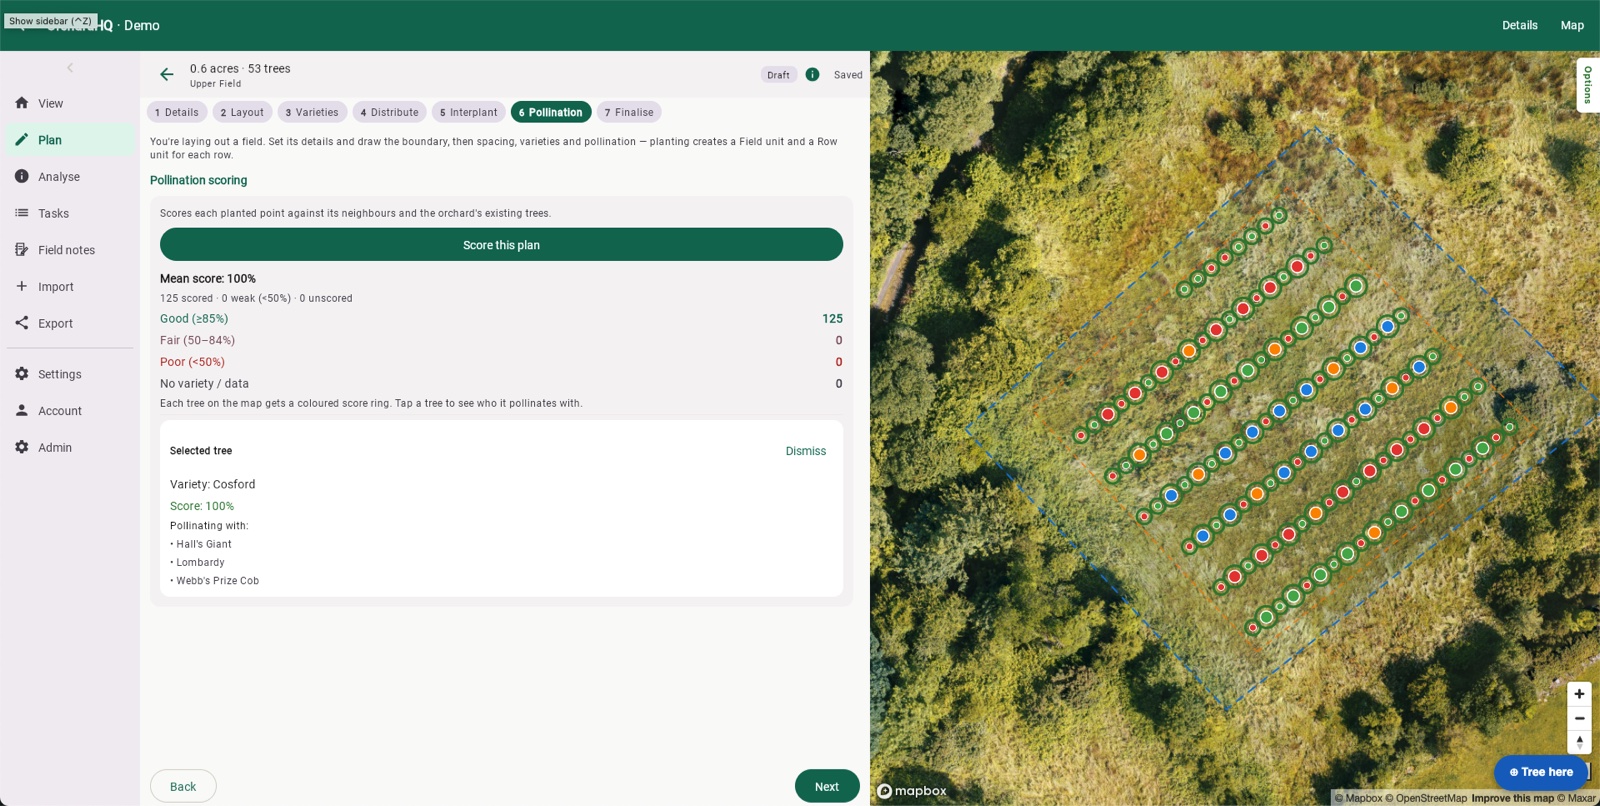
6. Pollination
Score every planted point against its neighbours and the orchard's existing trees — same flowering window, compatible variety, within effective distance (80 m for apple and pear, 15 m for cobnut, 100 m for walnut). Tap a tree to see its score and exactly which varieties it's pollinating with. This matters most for small orchards, where a single missing pollination partner can leave a big share of the trees unpartnered — adjust the mix and re-run if you see poor scores.
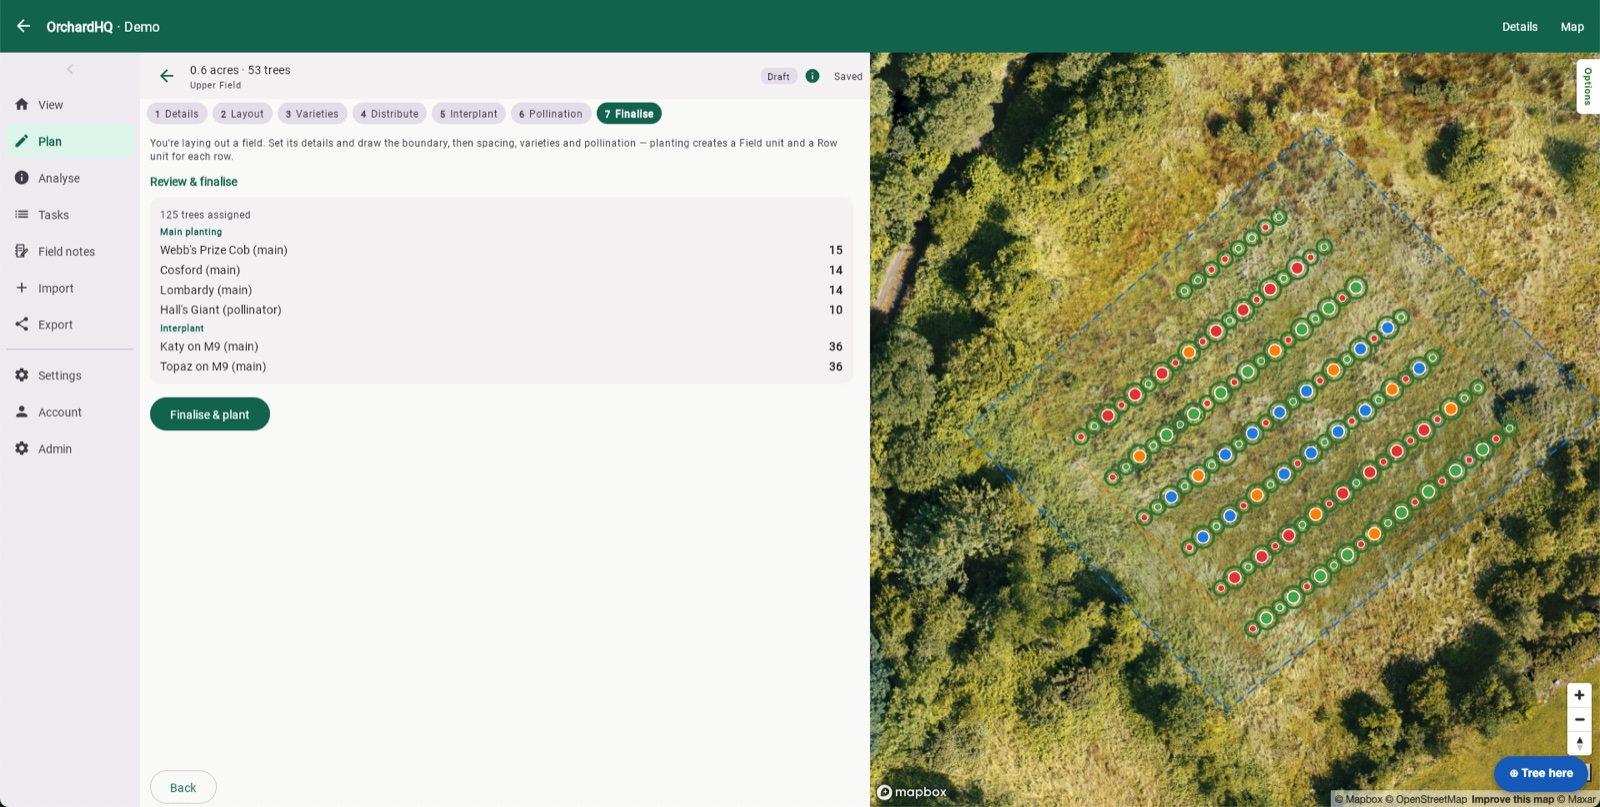
7. Finalise
Review the full planting list — main planting and interplant, by variety — then hit Finalise & plant. The trees appear in your orchard and count towards your tree quota; planting creates a Field unit and a Row unit for each row. They can't be edited in the planning tool after that, but you can move and edit each one in the main map view.
You can also create multiple plans for the same field and compare them side by side — different varieties, spacings or layouts — before you commit to one.
On the roadmap
Plan is built around laying out a real block on a real boundary, choosing varieties that pollinate each other, and turning the result into a planting list you can work from. Next, we're adding smarter recommendations:
- Recommending rootstocks for your soil type and climate.
- Recommending varieties for your climate — and to pollinate with trees you already have.
- Recommendations for cider properties.
If you need something we don't yet support, please tell us.
From the orchard
A guide explains; a walkthrough shows. Posts from Frank's own orchard in Gort:

Planning a cider orchard for 2028
Grafting choices, variety mix, layout. Three years out — what we lock in now and what we leave open.

Walnut and stone pine with cobnut and almond interplant
Designing a polyculture: walnut and stone pine as the canopy, cobnut and almond interplanted between. What the planner does, and what it can't.
Don't see what you need? hello@orchardhq.app — we'd like to hear about it.
Try the planner on the demo orchard.
Try the demo → Request access →